Eleventy and Snipcart shop demo
Snipcart is a really nice plug and play e-commerce checkout. Just to be clear, I don't have any partnership with them, I just came across the tool and found it quite interesting. Snipcart is not a way to pull the data into your website through an API or anything, is the other way around. Snipcart fetch the data from your website so, let's see how.
Installation
I am assuming that you already know how to use a terminal, Eleventy js and what is a package.json.
So, create a new folder and start in your terminal to init a new package.json at the root of the folder.
npm init -yThe -y parameter tells npm to skip all the questions and just use the defaults.
Then install Eleventy js.
npm install --save-dev @11ty/eleventyYou can then add some command in your package.json to serve and watch your template:
"scripts": {
  "serve": "eleventy --serve"
}
Structure
I have created a basic folders and files structures that looks like:
/src
    /_data
    /_includes
    /images
    /posts
    /scripts
    /scss
    blog.njk
    index.njk
    product-page.njk
    shop.njk
.babelrc
.eleventy.js
.gulpfile.babel.js
.package.json
In the _data folder is where all the magic come from for the eleventy part :) You can find all about it in the well documented site. Inside this folder, you will find 2 files: site.json that contains all the metas infos and navigation infos ... And products.json that contains all the product items infos such as name, price, description ... You can get data from an external source but the point here was to show Snipcart and not about querying external data, maybe i will do another post about this topic.
Snipcart setup
First you will have to create an account to access your dashboard. I have to say that the documentation is really well done, you can find everything you need to get started.
For the moment there is nothing in the dashboard, no products, nothing. In the regional settings you can set the country, the currency that you want to use ...
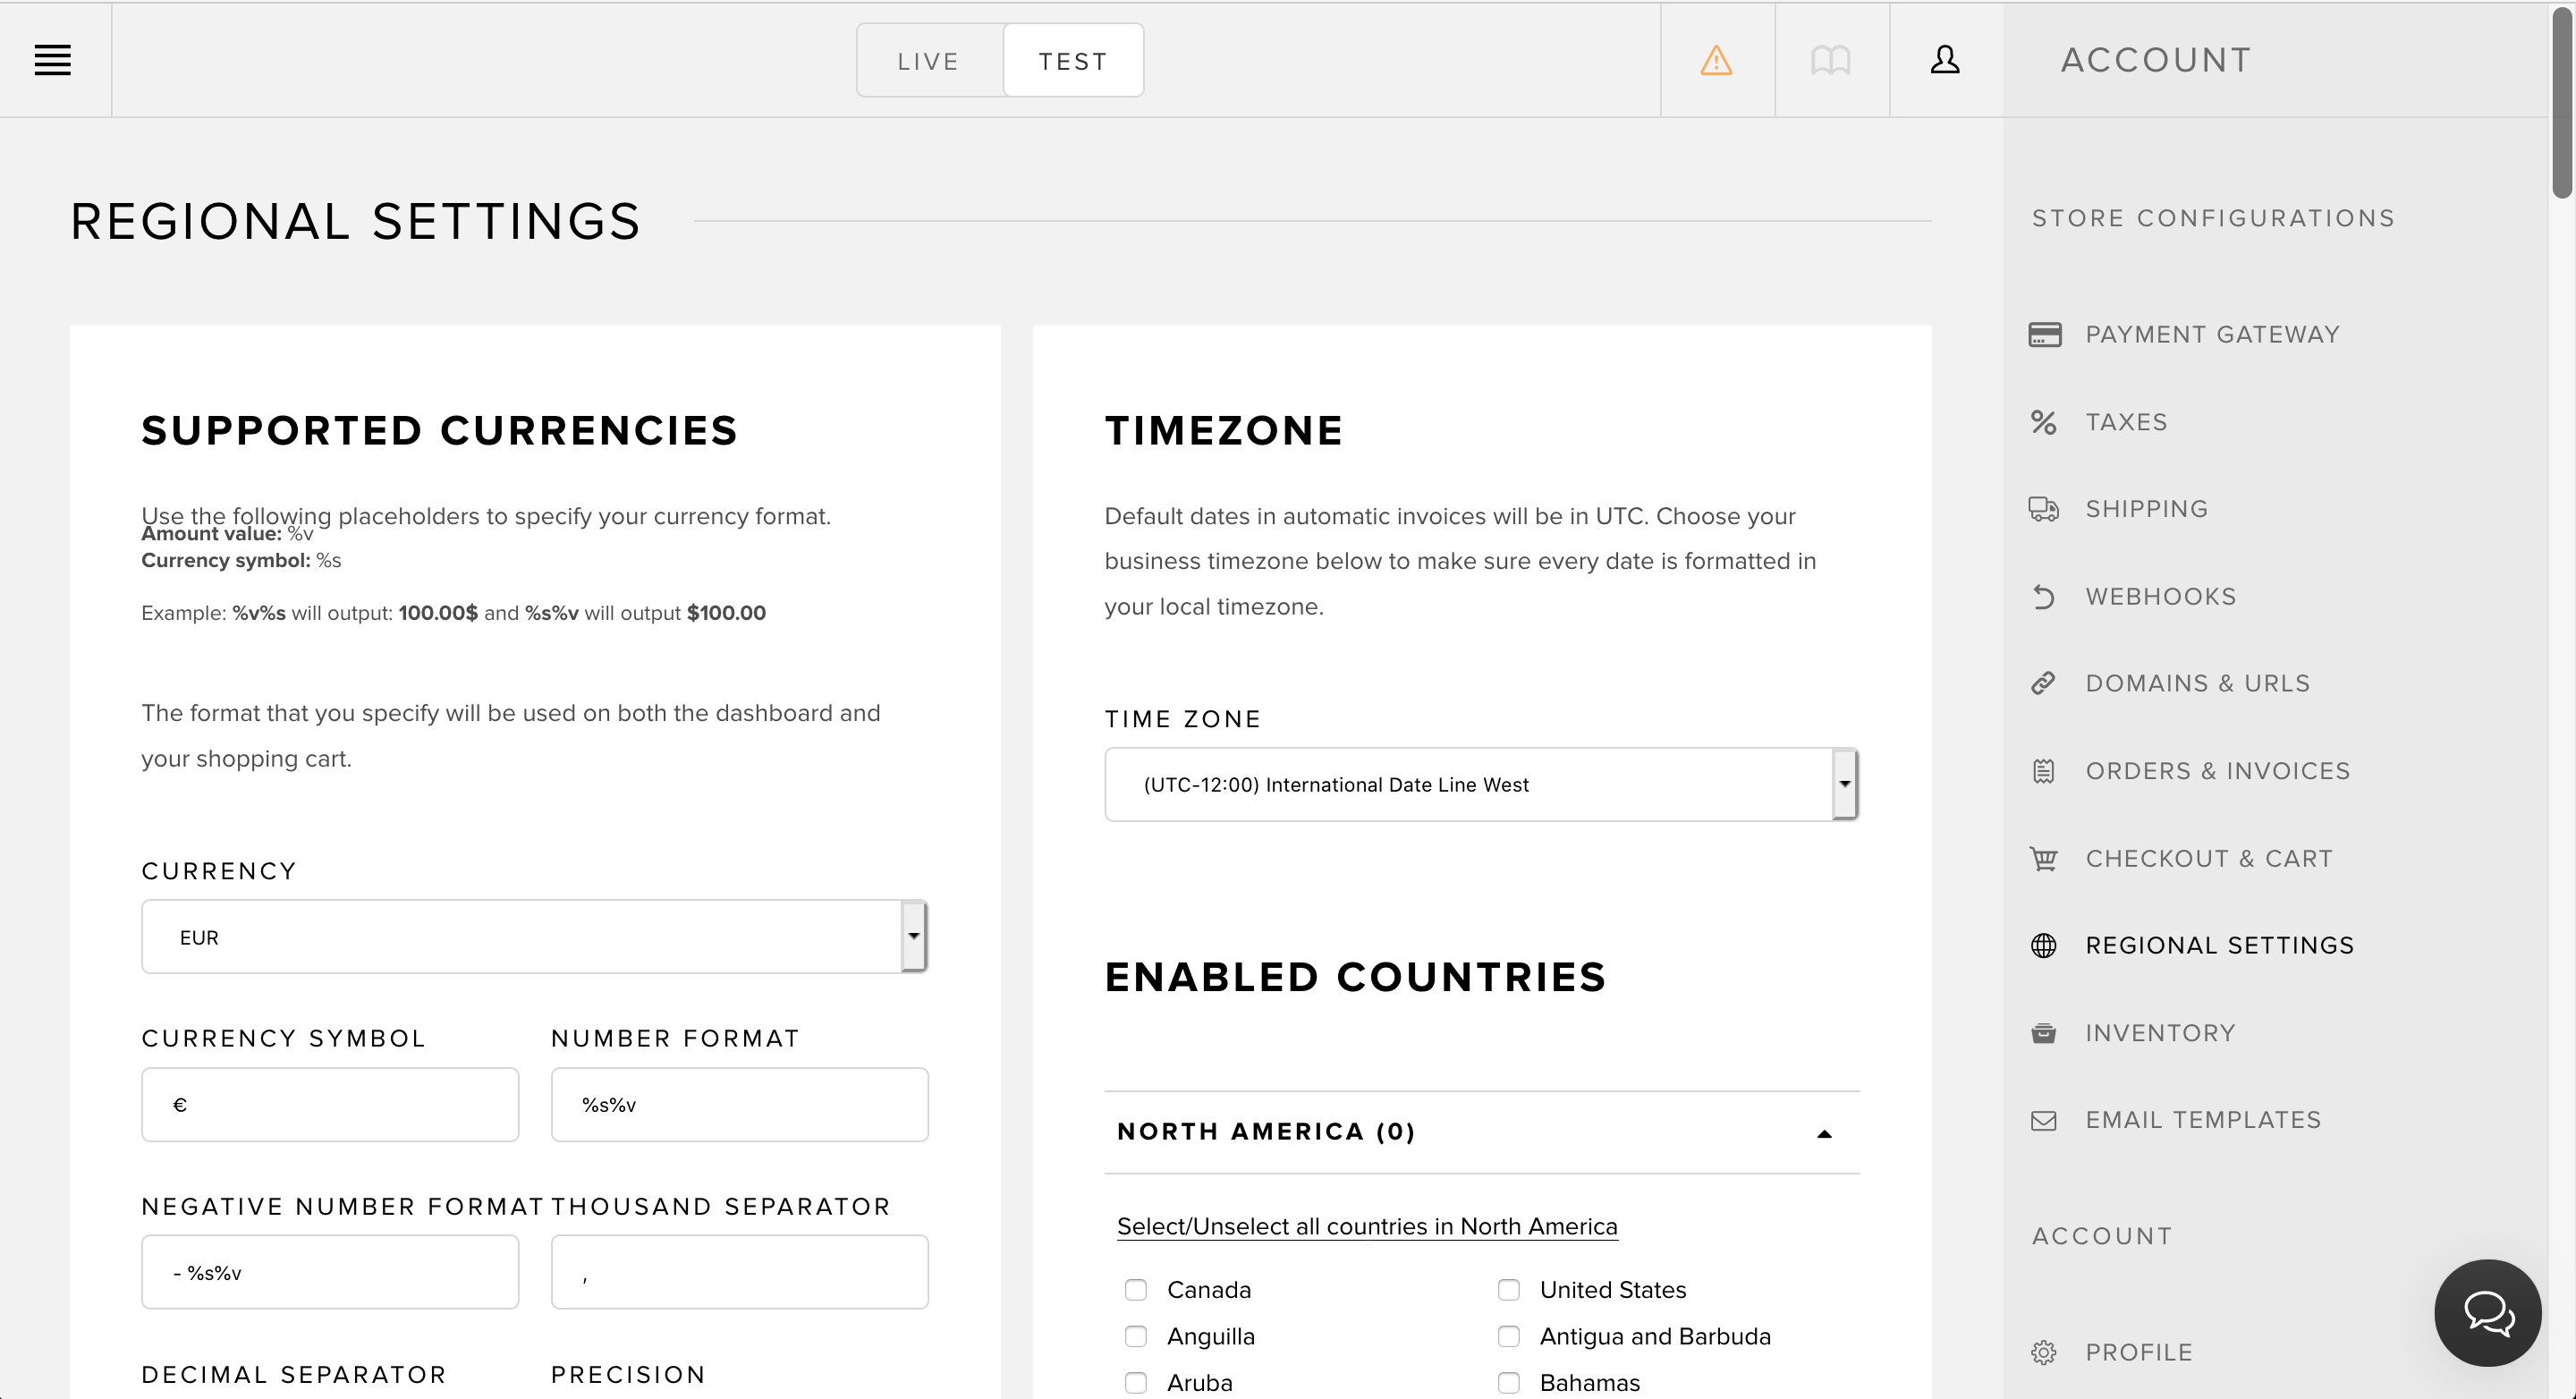
Snipcart checkout language will be set from html lang <html lang="en"> here it will be in english. Just change it to <html lang="fr"> to display it in french. And if you have multilingual website, change it according to your locale environnement variable.
Now you need to add two things in the footer, a hidden div with your public test api key and the snipcart script. You can find the test api key in your account settings.
<div hidden id="snipcart" data-api-key="<your_public_api_key>"></div>
<script src="https://cdn.snipcart.com/themes/v3.0.10/default/snipcart.js"></script>
Adding product
Snipcart works thanks to specific class and data-attribute. All you need to do is to add a <button> element with the snipcart-add-item class and then add the predefined snipcart attributes to link it to your dashboard shop.
This is the official doc example :
<button class="snipcart-add-item"
  data-item-id="starry-night"
  data-item-price="79.99"
  data-item-url="/paintings/starry-night"
  data-item-description="High-quality replica of The Starry Night by the Dutch post-impressionist painter Vincent van Gogh."
  data-item-image="/assets/images/starry-night.jpg"
  data-item-name="The Starry Night">
  Add to cart
</button>
There is also data-attribute for dropdown options for different sizes or colors. You can manage products stock manually once you have fetch all your products from your website, but i will talk about this later in the post.
So back in the shop template, what we can do to create page shop is to call in a loop the list of products, store in our products.json and get for each product the name, price, description ... and don't forget to add snipcart-add-item button class with the same informations :
{% for product in products.products %}
    <div>
        <a href="product/{{ product.url }}/index.html">
          <img src="{{ "/" | url }}{{ product.image }}" width="300" loading="auto">
          <p>{{ product.name }} - {{ product.price }}{{ product.currency }}</p>
          <p>{{ product.description }}</p>
        </a>
        <button class="snipcart-add-item button"
          data-item-id="{{ product.id }}"
          data-item-price="{{ product.price }}"
          data-item-url="{{ product.url }}"
          data-item-description="{{ product.description }}"
          data-item-image="{{ "/" | url }}{{ product.image }}"
          data-item-name="{{ product.name }}">
          Add to cart
        </button>
    </div>
{% endfor %}
I have simplify this code snippet here so you don't get embarrassed with the classes, but in the demo i have added class to style the product item.
Now you should see the list of your products. For the moment nothing happen when you click the button since we didn't put yet a the chekout button. So let's do this. Well to be honest it's as easy as we did before.
Chekout
In the _includes/partials/nav.njk template you can add different element.
The first you will need is an element with the snipcart-checkout class such as :
<button class="snipcart-checkout">Checkout</button>You can also display the number of items in the cart and the total price such as:
<span class="snipcart-items-count"></span>
<span class="snipcart-total-price"></span>
Dashboard product
Once your shop is ready and online, you can add all you product in your dashboard from the shop url. It will fetch all the products with the appropriate classes and attributes. You can add as many test api key that you want to test mutliple features such as promo code.
Now you have everything you need for your shop 💪!!
What else ?
You can override the css part for the checkout look & feel AND also override each component of the checkout! Snipcart is powered by Vue.js under the hood. Here is the documentation about it and the list of the component you can override. In your footer part inside the hidden div, with your public test api, if you want to override for example the item line of the checkout you can add :
<div hidden id="snipcart" data-api-key="<api_key>">
   <item-line>
       <li class="snipcart__item__line snipcart__box">
           <div class="snipcart__item__line__product">
               <div class="snipcart__item__line__header">
                   <h2 class="snipcart__item__line__header__title">

                   </h2>

                   <item-quantity class="snipcart__item__line__quantity" v-if="!adding"></item-quantity>
                   <div class="snipcart__item__line__header__actions">
                       <remove-item-action class="snipcart__button--icon">
                           <icon name="trash" class="icon--red"  alt="item.remove_item"></icon>
                       </remove-item-action>
                   </div>
               </div>
           </div>
       </li>
   </item-line>
</div>
You don't need to know much about Vue.js even if it's better to understand what your doing of course.
Conclusion
You can use Snipcart with pretty much anything, from html file, to frameworks, CMS ... I have made some few days ago an Eleventy multilang demo, you can definitely mix it with Snipcart with different currencies. I hope you will enjoy playing around with Snipcart with or without Eleventy, you can imagine anything really.